
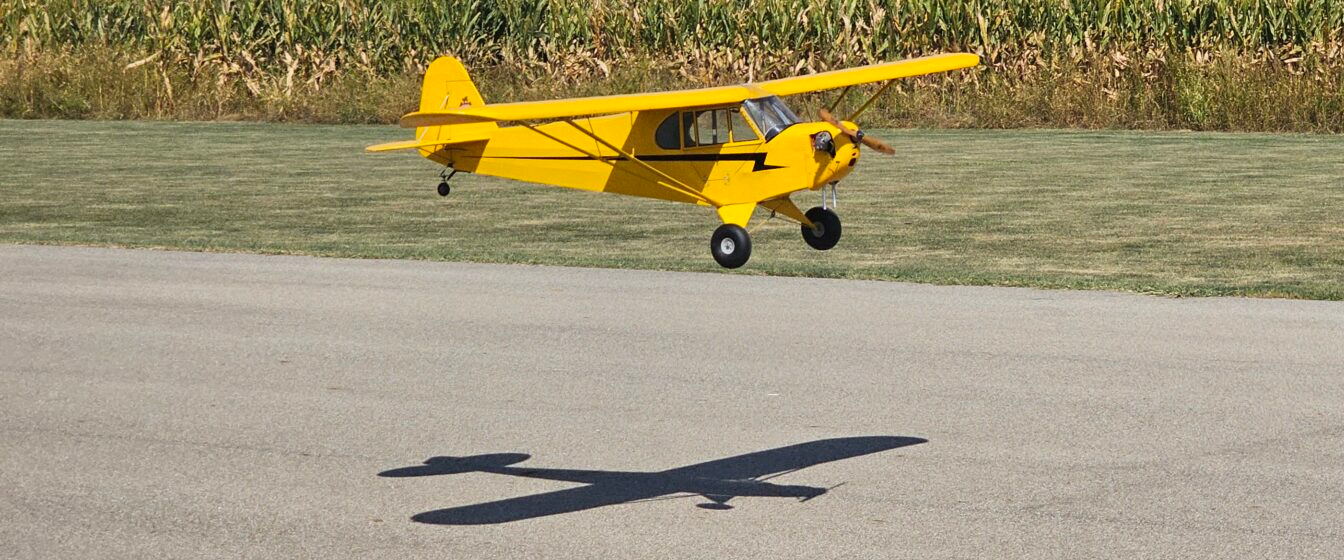
Part of the RC Airplane Flying Skills Center
Most landing problems start well before the airplane reaches the runway. A rushed pattern, a tight base turn, too much altitude, or too little airspeed can leave you trying to fix three things at once when the ground is getting close.
A good landing is usually the result of a boring, repeatable approach. Fly the same basic pattern, make small corrections, and give yourself permission to go around. You do not have to save every approach.
Set up a pattern you can repeat
Fly a downwind leg parallel to the runway at a distance where you can still judge the airplane’s attitude. If it looks like a dot before you turn base, you are too far away. If the turn puts the airplane nearly over your head, you are too close.
Reduce power and let the airplane begin a controlled descent. The exact throttle setting depends on the airplane, wind, and pattern, so use the manufacturer’s recommendations as a starting point. The goal is to arrive at the base turn with enough altitude and airspeed to make a normal approach without diving or stretching the glide.
Before the flight, decide which direction the pattern will run, where you will stand, and where you will go if the engine or motor quits. Check the field boundaries and anything near the approach path. Trees that look a long way away from the flightline can look much closer when you are trying to bring a large airplane over them.
Plan the landing before the battery or fuel makes the decision
Use a timer that fits the airplane and the way you fly it. Leave enough energy for a missed approach. On one of my early flights with the MB-339, I was worried about trees at one end of the runway and about getting the jet too slow. I made two approaches without forcing either one. On the third attempt, I calmed down, got the approach right, and made a good landing.
When I taxied back and opened the hatch, I found the main tank empty and the engine drawing from the UAT. One more go-around would likely have turned into a dead-stick landing. Going around was still the right decision on the first two attempts, but the story is a reminder that fuel and battery capacity are part of every landing plan. Do not wait until the last possible minute to start the approach.
Do not tighten the base-to-final turn
Turn base with enough room to complete a normal turn onto final. If you overshoot the centerline, resist the urge to add a lot of rudder and pull harder. A steep or skidding turn at low altitude can stall the airplane and drop a wing before there is room to recover.
If the geometry is bad, continue the turn safely, add power, and go around. A new pattern costs less than an airplane.
Use final approach to remove small errors
Line the airplane up with the runway and make small corrections. Use throttle mainly to adjust the descent path and elevator to manage attitude and airspeed, while remembering that the two controls work together. Reducing power usually requires an attitude change. Adding power can change pitch and yaw, especially on a larger propeller-driven model.
Keep the wings level with aileron and use rudder to keep the airplane aligned. Watch the whole airplane and its path instead of staring at the nose. If it is drifting, fix the drift early. Large, late corrections close to the runway usually make the next problem.
Do not drag the airplane in with the nose high and the wing close to a stall. Do not point the nose sharply down just to reach the runway either. Change the power, stabilize the approach, and go around when the airplane never settles into something you recognize.
Let the flare remove the descent
As the airplane reaches the runway, gradually raise the nose enough to reduce the descent. The flare is a smooth transition. A sharp pull can make the airplane climb again, run out of speed, and drop onto the runway from higher than where you started.
Look farther down the runway instead of directly under the airplane. Your peripheral vision will give you a better sense of height and motion. Keep reducing power as appropriate for the model and hold the airplane just off the surface until the main wheels touch.
A tricycle-gear airplane should normally touch on the main wheels before the nosewheel. Landing nosewheel-first can start a bounce or porpoise. A taildragger may be landed on the main wheels or in a three-point attitude depending on the airplane, conditions, and technique. Follow the model’s instructions and learn one method at a time.
The flight is not over at touchdown
Keep flying the airplane through the rollout. Use rudder or nosewheel steering to hold direction. In a crosswind, continue using aileron to keep the upwind wing from lifting, increasing the correction as the airplane slows and the controls become less effective.
Use the elevator position that fits the landing gear and conditions. A taildragger often benefits from up elevator after the tail is down because it helps keep the tailwheel planted. On rough grass, too much braking or the wrong elevator input can help a model nose over.
Do not make a hard turn toward the pits while the airplane is still moving quickly. Slow down, clear the runway when it is safe, and announce that the runway is clear.
A go-around is part of landing
If the airplane is too high, too fast, badly aligned, unstable, or running out of runway, go around. Add power smoothly so the torque and thrust change do not surprise you. Control the yaw, stop the descent, and establish a climb before changing configuration or starting the turn.
If you are using flaps, do not snap them all the way up while the airplane is slow and close to the ground. Follow the procedure for that model and retract them in stages when appropriate.
I do not consider a go-around a failed landing. Continuing an approach that I already know is bad is the mistake. On that MB-339 flight, the third approach was good because I stopped trying to force the first two. The fuel level also taught me to begin earlier and keep track of how many attempts I can afford.
When the power quits, protect the airspeed
A dead-stick landing gives you one approach. Lower the nose enough to maintain airspeed, choose the best reachable landing area, and fly a simple pattern to it. Do not stretch the glide by holding more up elevator. That only trades away airspeed and can produce a stall before the runway.
I was flying a repaired Cub when its gasoline engine shut off as if somebody had flipped a switch. The airplane was in an awkward position, and I had only flown it once before. I used a sideslip and a few gentle turns to get it arranged, then brought it back to the field. It carried more speed than I expected, but it made the runway without damage.
Afterward, we traced the problem to an unreliable connection in the ignition shutoff wiring. The landing mattered, but so did what happened next: we did not keep flying until we found a cause. After any unexplained power loss, inspect the fuel or electrical system before another flight.
Call out a dead stick loudly at a shared field. Other pilots should clear the pattern and runway because you do not have the option to circle again. If the runway is no longer reachable, land under control in the best available area. Reaching the runway is less important than keeping the airplane flying all the way to the ground.
Crosswind and water landings
Crosswind
Correct the ground track on final, then align the airplane with the runway for touchdown. Depending on the model and your technique, you may crab into the wind and straighten before touchdown, or use a wing-low sideslip with opposite rudder. Keep the upwind wing from lifting during rollout.
Use only the crosswind you can handle comfortably. Gusts close to the ground can change the approach quickly, so carry the airspeed recommended for the conditions without turning the landing into a high-speed arrival. Our wind and crosswind guide covers wind judgment and control corrections in more detail.
Water
A floatplane needs a straight, controlled arrival and continued steering as it slows. Reflections and glassy water can make the height difficult to judge. Read the water-landing guide for the approach, float handling, and retrieval planning.
Common landing problems
- Bounce: Often caused by excess speed, an abrupt flare, or touching nosewheel-first. Hold a safe attitude after a small bounce; go around when it starts getting worse.
- Porpoising: Repeated nosewheel and main-wheel contacts caused by chasing each bounce with elevator. Add power and go around before the oscillation grows.
- Nose-over: Check the surface, wheel size, landing-gear position, braking, and elevator use during rollout.
- Ground loop: Keep steering after touchdown and use small rudder corrections before the swing becomes large.
- Stall on final: Protect the airspeed, especially in the base turn. Do not use extra elevator to stretch an approach.
- Floating past the touchdown point: The approach is probably too fast, too steep, or carrying too much power. Go around before the runway disappears behind you.
If the airplane repeatedly bounces, noses over, or ground-loops, use the landing diagnostic to separate a technique problem from a mechanical one.
Practice the approach without demanding a landing
Fly normal patterns and low approaches at a safe height, then add power and climb away. Practice lining up with the runway, controlling the descent, and judging speed. Once the sight picture becomes familiar, the touchdown stops feeling like a separate emergency at the end of every flight.
A simulator is useful for practicing patterns, crosswinds, and go-arounds. At the field, an instructor can stand with you and call out the pattern while you keep your eyes on the airplane. Start with a forgiving trainer and calm weather. There is plenty of time for short runways and difficult crosswinds later.
Keep working on the basics
- Takeoffs and the first climb
- Flying in wind and crosswinds
- Trimming and control setup
- RC Airplane Flying Skills Center
- Learning Library
A good landing does not have to be perfect. It needs to be controlled. Set up early, keep the airplane flying, and make another approach when the first one is not working.